
Portfolio
Character animation
Unit Aim
To develop your knowledge of, and responsiveness to, the distinctive and individual audiences for specific art and design activities. To use this knowledge and understanding to develop more focused and enhanced creative solutions to art and design problems
Subject Aim:
"There is no particular mystery in animation...it's really very simple, and like anything that is simple, it is the hardest thing in the world to do."
-Bill Tytla, Walt Disney Studios, 1937
Learning body mechanics is essential to getting a character to move in a realistic manner. The traditional animation techniques of using arcs, working with anticipation action and reaction, secondary motion are all essential to bring a character to life. Learning how to do this within Maya using its technical animation toolset is an essential step into the professional world of 3d animation
THE 12 PRINCIPLES OF ANIMATION
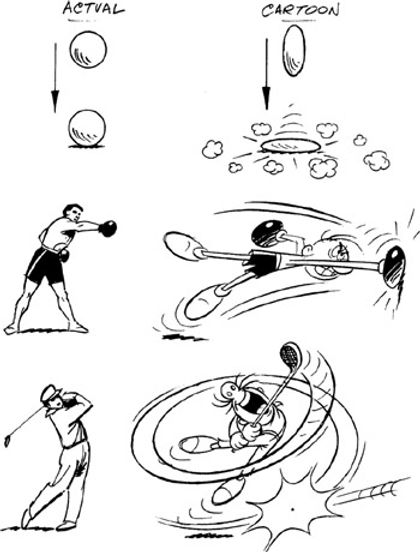
The most important animation principle is called squash and stretch. When an object moves, its movement indicates the rigidity of the object. Many real world objects have little flexibilty, such as furniture, however most organic objects have some level of flexibility in their shape.
1. Squash and Stretch – The squash and stretch principle gives the illusion of weight and volume to a character as they move. This is done by expanding and compressing the character’s body.


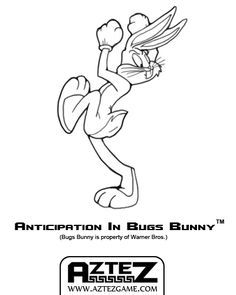
2. Anticipation – Anticipation is used to let the audience know that a major action is about to take place. To do this, animators will often work in a smaller action or two, right before the major action to signal that something is coming.


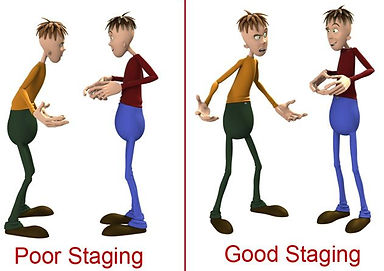
3. Staging – Staging is the principle that every pose or action that a character makes should convey a clear intention.
Staging is the presentation of an idea so that it is clear. This idea can be an action, a personality, an expression, or a mood. The key idea is that the idea is made clear to the viewer. An important objective of staging is to lead the viewers eye to where the action will occur so that they do not miss anything.


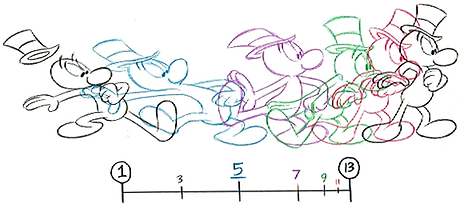
4. Straight Ahead and Pose to Pose – Straight ahead and pose to pose refers to the techniques by which animation is crafted. The pose to pose technique involves drawing the key poses that you’d like the character to take first and then filling in the transitional poses second.
These are two different ways to animate an action. The straight-ahead technique means to animate your action from drawing 1 to the end in sequence order. The pose-to-pose technique is a bit more intricate as it means to draw the key poses first (often the beginning and end drawing of the action and some other key moment between. Once the key poses are done, the breakdown and in between drawings are added to fill the rest of the animation. Smoke, water and other fluid elements are often animated using the straight-ahead technique. Actions that require tight timing and structure are often animated with the pose-to-pose technique. This method helps maintain a solid structure and preserve the volume. Sometimes, when using the straight-ahead technique, it may be difficult to calculate where the action will end up and the final drawing may be out of proportion and not where it should be.


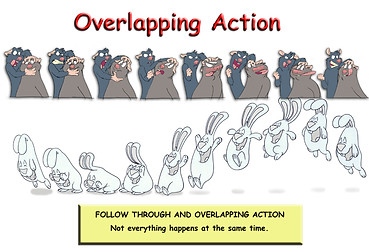
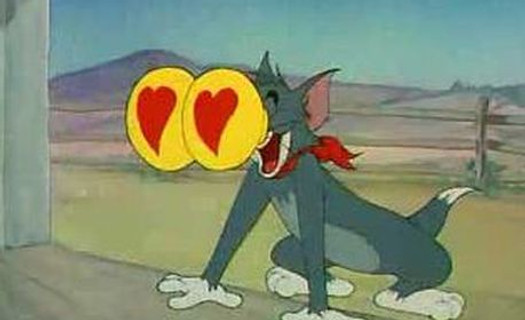
5. Follow Through and Overlapping Action – The follow through principle argues that when a character is in action and stops, nothing stops all at once. So when a character is running and stops, their main body will stop, but the other parts of their body will keep moving for a bit after. For instance, in this scene, Mulan’s head stops first and then her hair.


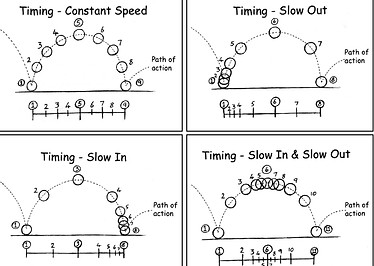
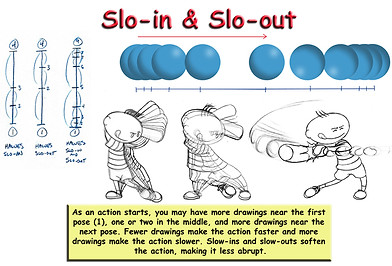
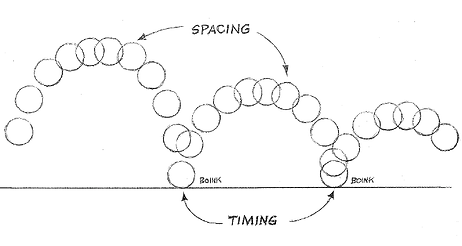
6. Slow-In and Slow-Out – Slow-in and slow-out is another principle designed to add realism to the movement of characters. When characters are performing actions, animators will draw more frames at the start of the action, less frames in the middle, and more frames again at the end of the action to create this slow-in/slow-out effect. (Kind of like a pendulum) Slow In and Out. This refers to the spacing of the inbetween frames at maximum positions. It is the second and third order continuity of motion of the object. Rather than having a uniform velocity for an object, it is more appealing, and sometimes more realistic, to have the velocity vary at the extremes

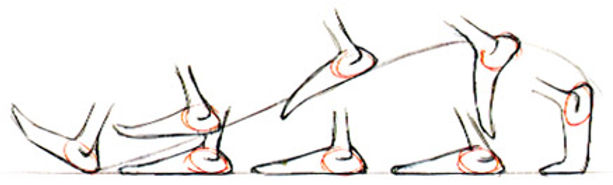
7. Arc – The arc principle is that almost all actions in life have a slightly circular motion. When a head turns or an arm moves, rarely will it thrust straight in and straight out.


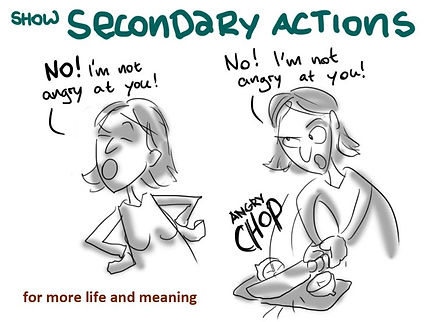
8. Secondary Action – A secondary action is an additional action that reinforces and adds more dimension to the main action. Secondary actions are important in heightening interest and adding a realistic complexity to the animation.

9. Timing – Timing helps create the illusion that an action is abiding by the laws of physics. By adjusting the timing of a scene, animators can make that scene look either slower and smoother (with more frames) or faster and crisper (with less frames).

10. Exaggeration – Exaggeration is all about overstating certain movements in a way that helps evoke a point, yet doesn’t ruin the believability of the scene.

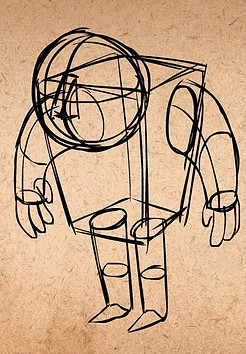
11. Solid Drawings – This principle encourages animators to be mindful of the fact that while forms may be presented in 2D, they should strive to look 3D. In a vague example, despite being drawn in 2D, through the animation choices we as an audience feel that a character has weight and is three-dimensional.
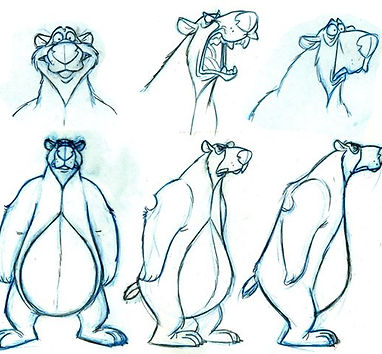

12. Appeal – Obviously, not every character should be appealing. But this principle posits that animators should strive to create images that will be interesting and compelling to audiences.
In animation, artists use the Appeal principle to create interesting characters that appeal to the audience. Appealing animation doesn't mean making everything fluffy and cute but creating a clear visual design that will capture the audience's interest.


Beside is an example of some principles of animation such as squash and stretch and secondary action. This is a simple rig of a cartoon like squirrel that I used to demonstrate these principles.

The video to the left is a rig of the popular model snout from the pair models "Lily and Snout".

Below are some examples of experimenting with animation and keyframes/rigging.
Poses
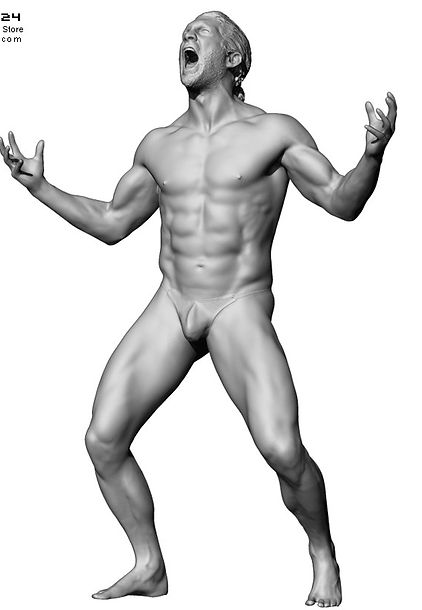
Despair


I'm a paragraph. Click here to add your own text and edit me. It's easy.
Anger


Phoneme
Animating speech can be one of the most difficult tasks in animation. The process of matching the mouth movements of your animation to the phonemes of your audio track is most commonly known as lip-synching. For a quick fix, it's no problem to just animate the mouth opening and closing, and it's a simple shortcut, especially when animating for the web. But if you want to add actual expression and realistic mouth movements, it helps to study how the shape of the mouth changes with each sound.
In linguistics, a phoneme is the smallest sound unit in a language that is capable of conveying a distinct meaning, such as the s of sing and the r of ring. Adjective:phonemic.
Phonemes are language specific. In other words, phonemes that are functionally distinct in English may not be so in another language. (Phonemes are customarily written between slashes, /b/ and /p/.) Different languages have different phonemes.
A grapheme is a letter or a number of letters that represent the sounds in our speech. So a grapheme will be the letter/ letters that represent a phoneme (see above). English has a complex written code and in our code a grapheme can be 1, 2,3 or 4 letters.
Basic Phonemes and Lip-Synching for Animation
These ten basic phoneme shapes can match almost any sound of speech, in varying degrees of expression--and with the in-between frames moving from one to the other, are remarkably accurate. You may want to keep this for reference.
-
A and I: For the A and I vowel sounds, the lips are generally pulled a bit wider, teeth open, tongue visible and flat against the floor of the mouth.
-
E: The E phoneme is similar to the A and I but the lips are stretched a bit wider, the corners uplifted more, and the mouth and teeth closed a bit more.
-
U: For the U sound, the lips are pursed outwards, drawn into a pucker but still somewhat open; the teeth open, and the tongue somewhat lifted.
-
O: Again the mouth is drawn to a pucker, but the lips don't purse outwards, and the mouth is rounder, the tongue flat against the floor of the mouth.
-
C, D, G, K, N, R, S, Th, Y, and Z: This configuration pretty much covers all the major hard consonants: lips mostly closed, stretched wide, teeth closed or nearly closed.
-
F and V: Mouth at about standard width, but teeth pressed down into the lower lip. At times there can be variations closer to the D/Th configuration.
-
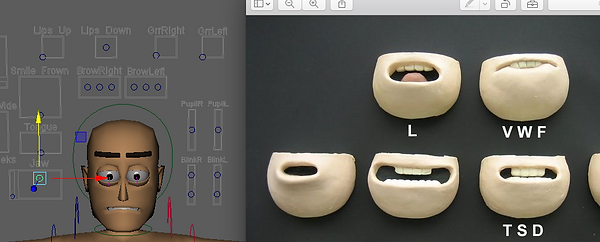
L: The mouth is open and stretched apart much like the A/I configuration, but
-
M, B, and P: These sounds are made with the lips pressed together; it's the duration that matters. "M" is a long hold, "mmm"; "B" is a shorter hold then part, almost a "buh" sound; P is a quick hold, puff of air.
-
W and Q: These two sounds purse the mouth the most, almost closing it over the teeth, with just the bottoms of the upper teeth visible, sometimes not even that. Think of a "rosebud mouth".
-
Rest Position: Think of this as the "slack" position, when the mouth is at rest--only with the thread of drool distinctly absent.
When you're drawing or modeling your animation, by listening to each word and the syllable combinations inherent you can usually break them down into a variation of these ten phoneme sets. Note that my drawings aren't perfectly symmetrical; that wasn't just shoddy sketching. No two people express themselves in an identical fashion, and each has individual facial quirks that make their speech and expressions asymmetrical.
Examples of phonemes with a downloaded Max Rig


I'm a paragraph. Click here to add your own text and edit me. It's easy.
